COPS – Another OPDS catalog

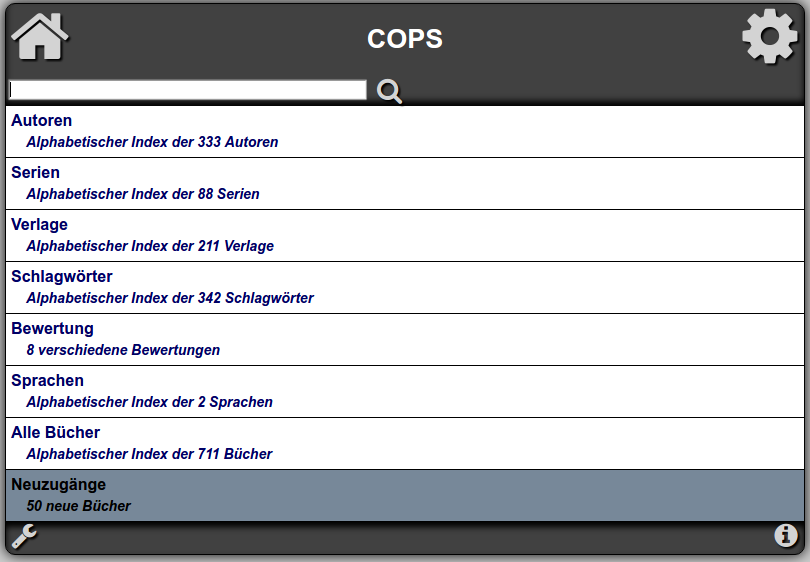
The setup using the owncloud app described here works really well. Unless you want to share your books and catalog with someone else and you use the owncloud user also for other stuff and files. Of course it would be possible to create a special books-user and share the folder with other users etc., but this is to complex for my single user installation. Looking for a ebook reader addon, I found COPS – Calibre OPDS (and HTML) PHP Server. COPS generates an OPDS catalog using multiple sorting features and provides a search function. It also includes an ebook reader.

Install some needed packages.

sudo aptitude install php5-gd php5-sqlite php5-json php5-intl

Download the latest version from github.
I created a new subfolder in the webserver’s document root under /var/www/cops/ and extracted the files.

Copy the example configuration.

sudo cp /var/www/cops/config_local.php.example /var/www/cops/config_local.php

Edit the config file and change the path to your ebook directory containing the metadata.db from calibre.

$config['calibre_directory'] = '/media/usb/owncloud/user/files/ebooks/';

Edit your nginx configuration to password-protect your book collection. Add the section to your server configuration.

location /cops {
auth_basic "Restricted";
auth_basic_user_file /etc/nginx/.htpasswd;
}

Generate the .htpasswd file with your tool of choice. For testing use an online generator.

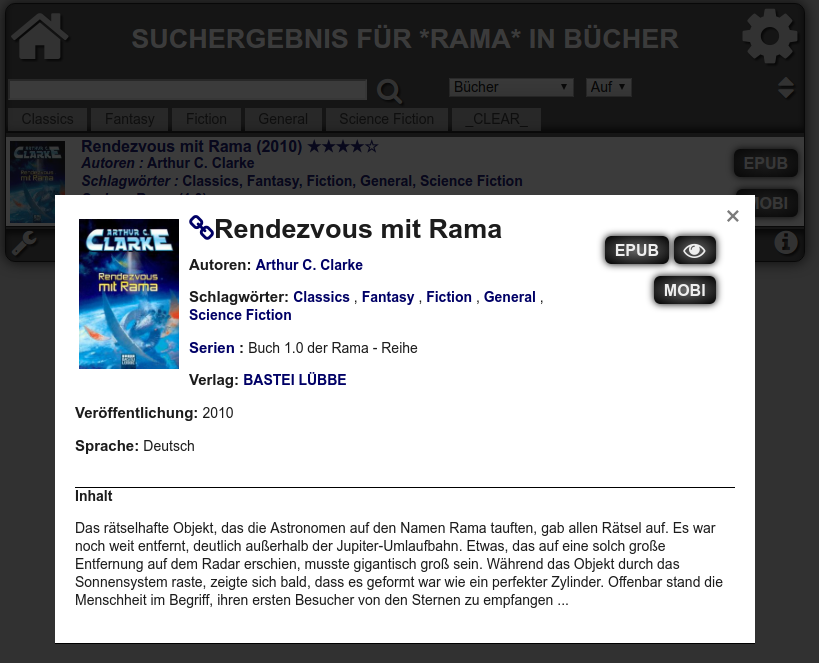
Point your browser to the encrypted SSL version of your url like https://yourip/cops. It should ask for a username and password and after correct credentials, show you your collection. To use the catalog with an app like FBReader, you need to apend feed.php to the url like https://yourip/cops/feed.php.cops

cops2


Replace harddisk to grow raid and lvm volume

I ran out of disk space on a 2 disk raid mirror. I already replaced one of the harddisks with a bigger 4TB one. The size doesn’t allow for MBR anymore and I needed to switch to GPT. The now smaller drive is also to replaced. Here are some of my notes for the procedure for later use. In the end I didn’t use this guide. I had a good backup and some time on the weekend as nobody needed the server, so I opted for the live migration. Since I already wrote most of the steps down, I will keep it and just add some notes at the end.

Mark the smaller disk as failed and remove it from the array.
mdadm --manage /dev/md0 --fail /dev/sda1
mdadm --manage /dev/md1 --fail /dev/sda2
mdadm --manage /dev/md2 --fail /dev/sda3
cat /proc/mdstat
mdadm --manage /dev/md0 --remove /dev/sda1
mdadm --manage /dev/md1 --remove /dev/sda2
mdadm --manage /dev/md2 --remove /dev/sda3

Shutdown the system, replace harddisk with new one and boot a live system. Install the needed packages.
aptitude install mdadm gdisk
modprobe raid1

Start raid.
mdadm --examine --scan >> /etc/mdadm/mdadm.conf

Clone the GPT partition schema to the new disk.
sgdisk --backup=table /dev/sdb
sgdisk --load-backup=table /dev/sda
sgdisk -G /dev/sda

Add to raid
mdadm --manage /dev/md0 --add /dev/sda1
mdadm --manage /dev/md1 --add /dev/sda2
mdadm --manage /dev/md2 --add /dev/sda3

Synchronisation starts. You can watch the process with
watch cat /proc/mdstat

Expand the raid to the new maximum size.
mdadm --grow /dev/md2 --size=max

Grow the LVM.
pvresize /dev/md2
lvextend -L +1TB /dev/mapper/deb7-home
resize2fs /dev/mapper/deb7-home
grub-install /dev/sdc --recheck

Reboot.

Manual integrity-check of raid.
/usr/share/mdadm/checkarray /dev/md0
/usr/share/mdadm/checkarray /dev/md1
/usr/share/mdadm/checkarray /dev/md2


Alternative: Live migration

Live migration is nearly the same, but you don’t have to reboot the system.

Hotplug the new (third) drive to your system. If the Sata-controller is set to AHCI mode, the system should recognize the new drive.

After cloning the partition table with sgdisk, add the drive to the raid.
mdadm /dev/md0 --manage --add /dev/sdc1
mdadm /dev/md1 --manage --add /dev/sdc2
mdadm /dev/md2 --manage --add /dev/sdc5

Grow the raid to 3 devices and let it recover.
mdadm /dev/md0 --grow -n3
mdadm /dev/md1 --grow -n3
mdadm /dev/md2 --grow -n3

Mark the to-be-replaced drive as failed and remove it from the raid array.
mdadm /dev/md0 --manage -f /dev/sda1 -r /dev/sda1
mdadm /dev/md1 --manage -f /dev/sda2 -r /dev/sda2
mdadm /dev/md2 --manage -f /dev/sda3 -r /dev/sda3

Shrink the array again to 2 drives.
mdadm /dev/md0 --grow -n2
mdadm /dev/md1 --grow -n2
mdadm /dev/md2 --grow -n2

Grow the raid and extend pv, lv and filesystem like above.

OPDS catalog in owncloud

A few ebook reader apps are able to connect to an OPDS catalog and fetch books from there directly. Since I store all my calibre-managed ebooks on my owncloud share, it would be nice to automatically generate such a catalog. Frank de Lange has built a plugin for owncloud to do just that. You can find it in his github or here.

To install, download the files and unzip them into the owncloud/apps/ directory.

After that change the directory permissions:

sudo chmod -R 750  /var/www/owncloud/apps/files_opds/

You also have to app the option

„appcodechecker“ => false

to your config.php. You can then activate the extension in the apps menu.

Visit the administration page and check your settings (defaults should be fine). After that change to your personal settings. Edit the directory containing your ebooks. Make sure, you don’t add a backslash at the end of the path. This one took me some time to figure out.

Root directory: /documents/ebooks

Click the „Schedule rescan“ button. After that you can access your OPDS catalog using your owncloud login at the url

https://yourinstallation/owncloud/index.php/apps/files_opds/

Chrome doesn’t know what to do with the data, but firefox displays the catalog nicely.

Amazon Fire Stick: Screensaver timeout

There are two timeouts for your fire stick:

  • Time until the screensaver starts
  • Time until the screen goes dark

The first one can be set in the preferences menu, the second only via adb. Enable debugging support on you device and connect via adb.

adb connect IP_ADDRESS
connected to IP_ADDRESS:5555
adb shell

Change the timeout:

shell@montoya:/ $ settings put system screensaver_timeout 30000
shell@montoya:/ $ settings put system screen_off_timeout 214760000
shell@montoya:/ $ settings get system screen_off_timeout
214760000

freedns an der Fritz!Box

Die Fritz!Box bietet Unterstützung für dynDNS. Eine ganze Reihe an Anbietern ist bereits hinterlegt. Mit der Auswahl „benutzerdefiniert“ lassen sich aber auch andere Anbieter einrichten. Benutzt man freedns als Provider benötigt man als URL den „direct URL“ für die subdomain. In der FAQ und an anderen Stellen wird erwähnt, dass sich diese rechts neben dem hostnamen befinden. Nach langer Suche habe ich festgestellt, dass das Layout geändert wurde und der Link nicht mehr angezeigt wird.

Auf der alten Übersichtsseite findet man den Link aber noch.

Owncloud: Es gab Probleme mit dem Code – Integritätsprüfung.

Owncloud hat wohl eine Integrationsprüfung für seine Dateien hinzugefügt (mit Version 9.0?). Da ich die util.php aufgrund von abweichenden Zugriffsrechten per Hand anpassen muss, erhalte ich in der Browseransicht die Fehlermeldung. Es funktioniert alles, aber der gelbe Balken stört.

Die Integritätsprüfung lässt sich durch einen Eintrag in der owncloud/config/config.php einfach abschalten.

'integrity.check.disabled' => true,

Anschließend auf der owncloud/index.php/settings/admin#security-warning die erneute Prüfung aktivieren.

Fieser workaround, aber tut was er soll.

Manual owncloud upgrade – full procedure

I always struggle with the steps involved to update a manual owncloud installation. I always need to check how to solve a specific permissions problem with the data directory on an external usb drive connected to the raspberry pi. So here it is.

Log in to the pi and download the latest version. Unpack it.

pi@pi ~ $ wget https://download.owncloud.org/community/owncloud-9.0.2.zip
pi@pi ~ $ unzip owncloud-9.0.2.zip

Backup the database.

pi@pi ~ $ mysqldump -u root owncloud -p > \ /media/usb/backup/owncloud/2016_05_13_owncloud/owncloud.sql

Become root, stop the webserver and change to the webserver directory and backup the owncloud files.

pi@pi ~ $ sudo bash
root@pi:/home/pi# service nginx stop
Stopping nginx: nginx.
root@pi:/home/pi# cd /var/www/
root@pi:/var/www# rsync -avrh owncloud \ /media/usb/backup/owncloud/2016_05_13_owncloud

Move the owncloud directory and copy the new files. Restore your config.php.

root@pi:/var/www# mv owncloud/ owncloud2
root@pi:/var/www# mv /home/pi/owncloud .
root@pi:/var/www# cp owncloud2/config/config.php owncloud/config/config.php

Fix the directory and file permissions. I put these commands in a small script and run it before the next step.

sudo find /var/www/owncloud -type d -exec chmod 750 {} \;
sudo find /var/www/owncloud -type f -exec chmod 640 {} \;
sudo chown -R www-data:www-data /var/www/owncloud/

Restart the webserver, change to the owncloud directory and start the upgrade procedure.

root@pi:/var/www# service nginx start
Starting nginx: nginx.
root@pi:/var/www# cd owncloud
root@pi:/var/www/owncloud# sudo -u www-data php occ upgrade
ownCloud or one of the apps require upgrade – only a limited number of commands are available
You may use your browser or the occ upgrade command to do the upgrade
Data directory (/media/usb/owncloud) is readable by other users
Please change the permissions to 0770 so that the directory cannot be listed by other users.
An unhandled exception has been thrown:
exception ‚Exception‘ with message ‚Environment not properly prepared.‘ in /var/www/owncloud/lib/private/console/application.php:120
Stack trace:
#0 /var/www/owncloud/console.php(83): OC\Console\Application->loadCommands(Object(Symfony\Component\Console\Input\ArgvInput), Object(Symfony\Component\Console\Output\ConsoleOutput))
#1 /var/www/owncloud/occ(11): require_once(‚/var/www/ownclo…‘)

Update 27.09.2016: The file has moved to owncloud/lib/private/legacy/util.php in owncloud version 9.1.x.

I have my data directory on an external usb drive which is mounted writeable for everyone. Owncloud doesn’t like that. You need to edit the permission check in the file owncloud/lib/private/util.php and change it from

if (substr($perms, -1) != ‚0‘) {
chmod($dataDirectory, 0770);
if (substr($perms, 2, 1) != ‚0‘) {

to

if (substr($perms, -1) != ‚7‘) {
chmod($dataDirectory, 0777);
if (substr($perms, 2, 1) != ‚7‘) {

If your permissions are different, you need to adjust the lines accordingly.

Here is my fstab:

root@pi:/var/www/owncloud# cat /etc/fstab | grep ‚/media/usb‘
UUID=1D3F163D4EEC069E /media/usb ntfs-3g defaults,auto,uid=pi,gid=www-data,umask=000,users,rm 0 0

Change the lines and restart the upgrade process.

root@pi:/var/www/owncloud# sudo -u www-data php occ upgrade
ownCloud or one of the apps require upgrade – only a limited number of commands are available
You may use your browser or the occ upgrade command to do the upgrade
Set log level to debug
Turned on maintenance mode
Checking whether the database schema can be updated (this can take a long time depending on the database size)
Checked database schema update
Checking updates of apps
Checking whether the database schema for <files_trashbin> can be updated (this can take a long time depending on the database size)
Checked database schema update for apps
Updating database schema
Updated database
Disabled 3rd-party app: files_opds
Disabled 3rd-party app: updater
Updating <files_texteditor> …
Updated <files_texteditor> to 2.1
Updating <gallery> …
Updated <gallery> to 14.5.0
Updating <files> …
Updated <files> to 1.4.4
Updating <files_trashbin> …
Updated <files_trashbin> to 0.8.0
Updating <files_versions> …
Updated <files_versions> to 1.2.0
Update 3rd-party app: files_opds
Starting code integrity check…
Finished code integrity check
Update successful
Turned off maintenance mode
Reset log level

Cleanup.

root@pi:/var/www/owncloud# rm -r /var/www/owncloud2
root@pi:/var/www/owncloud# rm /home/pi/owncloud-9.0.2.zip

Sources:
https://doc.owncloud.org/server/8.2/admin_manual/maintenance/manual_upgrade.html
https://forum.owncloud.org/viewtopic.php?t=25043

Drucker/CUPS in Samba auf dem Raspberry deaktivieren

Hat man keinen Drucker in Samba konfiguriert, wird das syslog oft mit Meldungen wie diesen zugespammt:

May 3 07:14:50 pi smbd[4609]: [2016/05/03 07:14:50.925006, 0] printing/print_cups.c:110(cups_connect)
May 3 07:14:50 pi smbd[4609]: Unable to connect to CUPS server localhost:631 – Verbindungsaufbau abgelehnt
May 3 07:14:50 pi smbd[22697]: [2016/05/03 07:14:50.928320, 0] printing/print_cups.c:487(cups_async_callback)
May 3 07:14:50 pi smbd[22697]: failed to retrieve printer list: NT_STATUS_UNSUCCESSFUL

Mit ein paar Einträgen in der /etc/samba/smb.conf kann man dieses Verhalten abstellen.

[global]

load printers = no
printing = bsd
printcap name = /dev/null
disable spoolss = yes

Install a full syslog-ng in pfsense

Some quick notes.

# Remove old syslog-ng package
pkg_info | grep syslog-ng
pkg_delete syslog-ng-1.6.12_1

# Installing new version
setenv PACKAGESITE
http://files.pfsense.org/packages/amd64/8/All/
ftp://ftp4.freebsd.org/pub/FreeBSD/ports/i386/packages-stable/Latest/
pkg_add -r syslog-ng

# Make sure there is a /usr/local/etc/syslog-ng.conf

# Autostart syslog-ng, edit /etc/rc.conf.local
syslog_ng_enable=“YES“

# Disable default syslog, /etc/rc.conf.local
syslogd_enable=“NO“

# Kill syslogd, start syslog-ng
kill `cat /var/run/syslog.pid`
/usr/local/etc/rc.d/syslog-ng start


Sources:
http://forum.pfsense.org/index.php?topic=3976.0
http://forum.pfsense.org/index.php/topic,7793.0.html
http://www.mail-archive.com/discussion@pfsense.com/msg02764.html
FreeBSD based version info: http://doc.pfsense.org/index.php/PfSense_and_FreeBSD_Versions

SSH-Tunnel mit Firefox nutzen

Kurz notiert:

Ich hatte etwas Probleme bei der Verwendung eines aktuellen Firefox mit einem dynamischen SSH Tunnel. Konnte ich in der Vergangenheit etwa mit dem Befehl

ssh -fNCD 4444 remotesshserver

einen SOCKS Proxy auf Port 4444 aufmachen und Firefox einfach auf diesen umlenken, funktioniert dies wohl aktuell(?) nicht mehr. Richte ich den Proxy in den Einstellungen des Browsers ein (localhost, Port 4444, alle Protokolle, SOCKSv5 etc), kann anschließend keine Verbindung aufgebaut werden. Die selben Daten, konfiguriert in FoxyProxy funktionieren allerdings problemlos.

Hilfreich bei der Fehlersuche:

ssh -N -vvv -D 4444 remotesshserver
curl –socks5 127.0.0.1:4444 http://icanhazip.com